 Servicing and repairing trailer brakes is not a black art but it appears that it is often done without actually removing the brake drums, which we find a tad strange, so when they arrive with us the state of them can be rather alarming. For those of you who are here because you can’t remember how to put them back together there are plenty of piccies and for those of you that reckon you can do it yourself then this is pretty basic and comprehensive guide that hopefully covers all the eventualities. If you are tackling this for the first time do one side at a time. You will then half a chance to check against the side that remains intact! In these days of super duper technology take a piccie of the operation with your phone (or camera-remember the days before cameras had phones on them?). The images may be helpful later. Finally don’t trust that the brakes you are looking at have been re-assembled correctly the last time they were apart. It is not unusual to discover the brakes don’t work because ‘someone’ has put them in back to front or adjusted the operating rod first rather than the brake adjusters! Weak springs will induce binding.
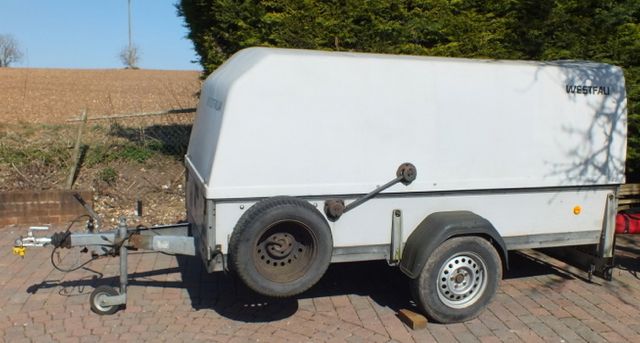
These days almost all the brakes fitted to axles on trailers, caravans and horseboxes are supplied by Knott or based on their design. They produce a simple and straightforward, good quality, robust and reliable (if maintained) system. Wendover Trailers, Westfalia Trailers, Indespension, Ifor Williams, Bateson, some Staffordshire and the vast majority of the Swedish and German Trailers all use them. There are a few other designs out there but they all work in pretty much the same way. We are going to look at Knott brakes as fitted to Westfalia trailers, beloved of the ballooning fraternity. Some Staffordshire Trailers used Knott brakes but they mainly went with Al-Ko which are notoriously bad for seizing up but parts are still available including the adjusters themselves. Please bear in mind that clonking on the overrun can also be the result of the brake damper having gone tits up. Brake dampers and brake adjustment are, therefore, intertwined. Check out the guide to replacing the damper ‘Stop the Clonk’ for more information.
The order of events here are, depending on what we find or diagnose, more or less the same as we take and are done in order of muckiness. Obviously there is no point trying to reassemble the brake shoes or fit new components when you are up to your armpits in grease. These days kinky protective gloves are available to protect dainty fingers and hands if that’s your thing. Apart from tools you will need, a decent bit of rag for wiping down, a decent grade of high melting point grease for the wheel bearings, Copperslip (copper-based grease) and a couple of new split pins and grease gun. Brake shoe kits normally have new springs and clips in them but not the Expander.  Some have a replacement bearing retaining nut but not all. Be prepared for a disaster. Bearings don’t always come off easily nor are associated components always suitable for re-use. Always have a very good look at brake shoes. They may appear all in one piece but linings can lift and edges break off. The auto-reverse carrier can stick through wear to the grooves so, if you are servicing the brakes, service them. As the whole shooting match is coming apart check and re-lubricate the wheel bearings before reassembling. If you have had your trailer on the drive for a year and now the brakes won’t come off then the thing to do is release the handbrake, then stick your hand behind the drum, find the cable and give it a jolly good shake. If that doesn’t work then jack it up, remove the wheel, wind out the adjuster and clout, with a degree of purpose, the edge of the drum. That should do it. You may have to bash it a couple of times before it releases but if it doesn’t then you are into pullers and grief but that is rare.
If you click on the pictures they should all get bigger so you can see what we are on about a bit more clearly.
Parts
 When ordering brakes shoes you’ll need to know the type, the trailer manufacturer should do, the width of the shoe and the inside diameter of the drum. The most common ones fitted to Westfalia trailers are 200×50. The smaller width brakes used are 203×40 and 200×30. Do bear in mind that with use the brake drum will wear and internal diameters will increase, so it is not uncommon for the drum to actually measure 205 in the case of 200×50. If its much more than that you really need new drums. As Knott brakes are fitted to so many different trailers the price of spare parts varies enormously. If you are stuck, Ifor Williams stock some compatible parts including 200×50. If you use the wibbly wobbly Web then there are some good suppliers of pattern ones but take care as the braking material used on brake shoes is not the same as car brakes. Make sure they come with new springs and clips.
Brake cables vary enormously. You will need to know the type of end fittings, the length of the outer cable and the length of the inner cable. The end fitting on the cable where it attaches to the axle or chassis normally takes an M12 nut with the adjuster being M8. The vast majority of Knott brakes use a cable that pushes over a split housing on the back of the brake drum and has an M8 threaded portion on the other.
Wheel bearings and seals are on the whole standard parts. There will numbers etched onto wheel bearing races to aid identification, likewise seals may have a number somewhere moulded into outer face. The spring-type seals on Westfalia Trailers can be replaced by a standard seal. Knock the inner races out and take the bits to your local Bearing Traders or similar and they should be able to help if you are in a rush.
Checking the brakes operation
 Obviously we need to check that the brakes work, or rather how they work, or not. I personally don’t even bother testing trailer brakes before stripping them down unless its one we service regularly because you can bet a pound to a penny there is going to be something seriously amiss somewhere but it doesn’t hurt to have a quick check.
With the trailer on level ground pull the handbrake on. Most have assisted handbrakes so watch it doesn’t have your eye out. Make a note how far it comes up. It shouldn’t be more than halfway. If its had your eye out then something is wrong. With the lever on try and move the trailer forward. Does one wheel lock and the other not? Does it still move? Now push it backwards. As these brakes are auto-reverse it should roll backwards slightly before the lever rises further and it locks up. Release the handbrake. Does it roll happily forwards and backwards. If it doesn’t then something is seized, or not releasing.
Trailer brakes are simple things. The bit that you hitch onto the tow ball, the coupling, is attached to a sliding drawtube that can slide back and forth in the coupling body. As you brake the trailer tries to catch the car up and the coupling body moves up the drawtube. At the trailer end of the coupling is a lever. As the drawtube contacts the lever it operates the brake rod then via cables (or occasionally rods) operates the brake linkage (expander) and all being well the brakes apply. Simple. As you then pull forwards again the drawtube is pulled out until it the brakes free off and connects with its stop and lo and behold you are towing again.
There are only really three things that cause the brakes to stick. Most commonly the cables are corroded, the linkage or the lever in the coupling is seized preventing the operating rod from releasing properly, or the linkage in the brake drum is seized. OK, I said three but very occasionally the drawtube gets bent and will stick or jam, usually as a result of a jack knifing.
What should happen is that, with the trailer uncoupled and handbrake off, there should be a bit of free play in the operating rod forward and backwards. When you apply the handbrake the lever should come no more than halfway up its travel. Both wheels should be locked up if you try and move it forwards. It should roll backwards slightly even with the handbrake on. If you push the trailer backwards and you pull the handbrake on further the wheels should lock up. Once released the trailer should roll easily with no brakes binding.
If the brakes do stick on, or are not working correctly, first off suspect the cables. Brake cables do not last forever. In the old fashioned days, when Zeppelins cruised the skies, they were often fitted with grease nipples but these days grease guns and maintenance is somewhat frowned upon so once the plastic liner has worn out or the outer case split then that will be the end of them. With the handbrake on have a gander underneath and see if the balance bar has been pulled out evenly. Release the brakes and have another look. Have the cables both returned to their off position and is there slack in them? If they haven’t further investigation will be necessary. Sticking cables can be the result of sticking linkage in the drum itself so its going to have to come to bits. Stainless steel replacement cables are now available and, although a bit pricier, do last a lot longer.
Preparing for drums off number one!
Almost all handbrake levers are now spring or piston assisted. The idea is that should the trailer become detached from the towing vehicle then the break-away cable will pull the brakes on assisted by the piston which once activated will keep the pressure applied. It is important that you secure the handbrake lever in the off position before starting any work. If it isn’t fitted with a locking hole or bolt (most aren’t) then a tank strap wrapped a few times round it and the drawbar will do the job.
Jack the thing up on an appropriate point. The axle is a good place or the outer chassis where a crossmember attaches. Put an axle stand under the drawbar (jockey wheels have been known to slip or collapse) and under the trailer proper. Take advantage of the situation to check the wheel bearings. Spin the wheel. If it sounds like a bag of nails or rumbles then there could be a problem with the wheel bearings so bear that in mind. Hold the wheel top and bottom and give it a slight rock. There should be little or no movement. Does the wheel spin freely? If it doesn’t then it will need some assistance before you are going to get the drum off. Drop the wheel back on the deck and loosen the wheel nuts or bolts. Jack it back up put the stand back under and take the wheel off.
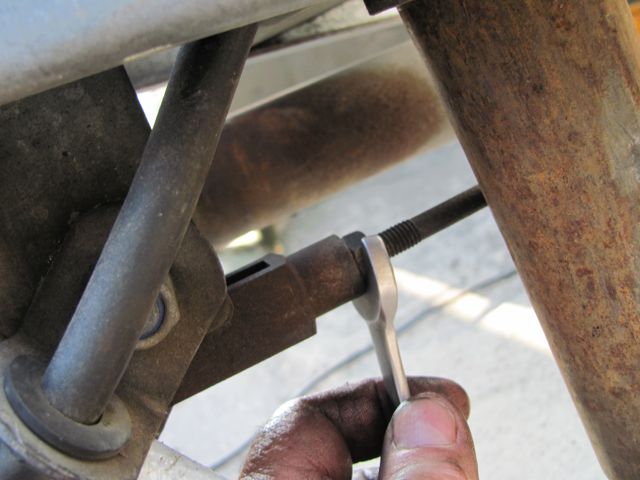
We drop the operating rod off at the coupling end only because the adjusting nut on the cable end is usually corroded solid. Look at the back of the coupling where the rod is attached to the bottom of the operating lever. Undo the locking nut, normally a 13mm or 17mm spanner will do the trick and unscrew it. You may have to use mole grips or similar on the rod itself along with Mr WD40. If it won’t come undone then try some heat from a blowlamp. A normal plumbers one will be enough. Make sure the coupling head is fully extended and get hold of the bottom of the lever and make sure it is moving freely back and forth. If it isn’t you are going to have to free it off. This can usually be done with patience and WD40 after slackening off the bolt that runs through the swivel. In extreme cases you may need to heat it up with the blowtorch. Some levers have a grease nipple right underneath in which case pump plenty of grease into it. Lovely. While your at if grease nipples are provided on the coupling body pump some grease into the coupling itself. Westfalia couplings with the V-shaped drawbar use a plastic/nylon bush to carry the drawtube and can’t be lubricated. Check to make sure there isn’t excessive up and down play in it.
Squad – Drums orf’
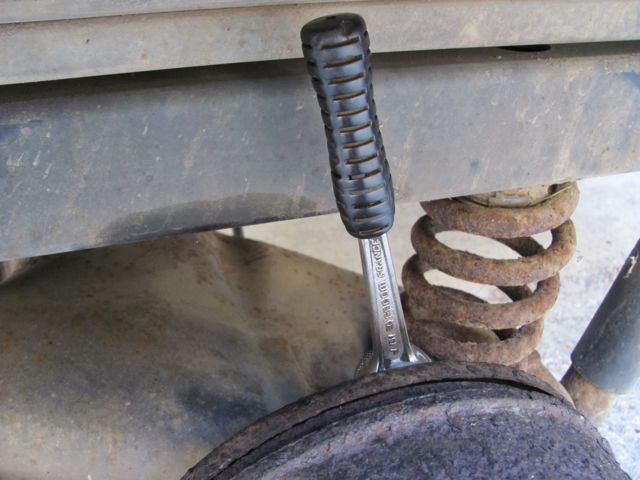
 Drum removal means undoing the wheel bearing. There can be a substantial amount of brake dust in and around a brake drum so a face mask is probably a wise precaution. There are two types of wheel bearing, most commonly they are the adjustable taper roller type but non-adjustable sealed roller ones are fitted on later models. Just occasionally you’ll find straightforward roller bearings but these are usually on the older or tinsy-type of trailers. Before trying to get the drum off get it on your side by slackening off the adjuster right off. Most commonly this is a 17mm headed nut or bolt on the back plate. Put a socket or spanner on it and undo it until it is rattly (clockwise, or to the right as you face it from the front of the drum) then give the drum a bit of a smack with the copper hide hammer. Some brakes have a slot in the backplate allowing access to a ratcheted toothed wheel. Sadly you’ll probably have to have to grovel under the trailer to get to the slot. Stuff a screwdriver through and engage it with the teeth then lever the wheel round tooth at a time by moving it up or down. You’ll probably turn it the wrong way to start with and the brakes will get tighter, in which case simply turn it the other way!
 If it’s a taper roller then remove the split pin and undo the castellated nut. Put something like a bit of cardboard or cloth on the deck to catch the bearings lest they fall out. You may be lucky and simply be able to pull the drum off the stub axle but if not put your thumb in the middle of the stub axle and fingers on the lip of the drum and give it a clout (Thor No2 will do or use a decent piece of 4×2, not a steel claw hammer) on the opposite side where the face of the drum meets the body of the drum pulling back at the same time. If that fails then the inner bearing is probably stuck on the shaft and you’ll need some concerted pulling and bashing to shift it. If you’ve got a slide hammer or decent puller, that’ll do the job. If it still won’t move the spring clips holding the shoes down have probably failed and when you pull the drum back it simply tips the shoes and lock the drum on. If this happens try turning the drum a bit at a time and bashing it from the side or turn the drum and pull. If it almost comes of and doesn’t it is most likely that there is a ridge on the edge of the drum and that is catching on the shoes. Slacken the adjuster off some more and that ought to do the trick. Don’t beat the back lip of the drum otherwise you’ll at best knock a lump out of it or at worse crack the drum. If the drum comes off leaving the bearing and seal on the shaft don’t worry as they can be removed once the brakes are stripped down.
 If it’s a sealed roller bearing (‘unitised’ is the latest buzzword) it will have a large nut that may or may not have a split pin through or it but may be ‘staked’ where the top of the nut has ring that is punched into a groove on the stub axle. I’ve never been able to ‘unstake’ but if you undo it a tad and then give it a rock it will free off without damaging the threads. This nut is done up seriously dog’s wotsits. We tend to undo these with the trailer wheel on the ground, chocked and with the remnants of the handbrake on to prevent the trailer moving. You will probably have to use a large bar on your socket to shift it. On all the smaller trailers the thread is standard anti-clockwise to undo, clockwise to do up and not handed. Once undone the brake drum should just pull off the shaft, albeit with a tug and a very gentle touch of Thor on the side of the drum. The bearings should stay together in the drum assembly. If the bearings pull apart don’t panic, collect up the balls if they’ve fallen out, keep all the bits together and sort it out later.
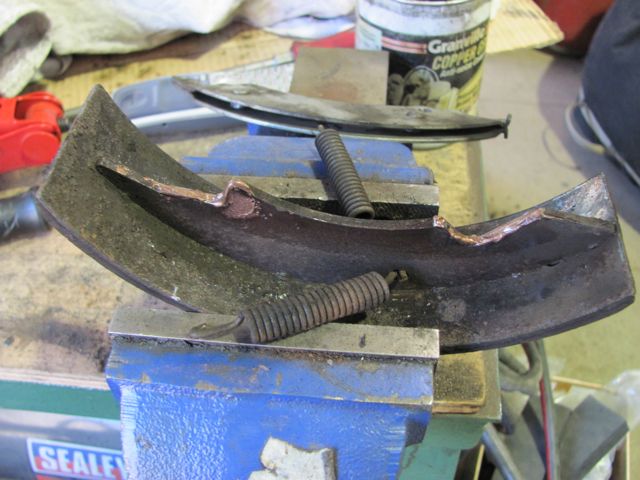
With the drum off you can now inspect the shoes to see what the problem is. On well neglected trailers there may not be any braking material left or the oil seal may have failed and the shoes be impregnated with grease. The expander may be jammed on or the spring clip holding the brake shoes down failed.
Commence stripping – the brakes silly
 The brake drum should now be laying at your feet and the brake shoes sitting happily on the backplate. Now if there are bits of bearing and seal still on the shaft wrap a bit of cloth around them to stop rust, muck and the remains of the brake shoes contaminating them. Using a good stiff brush and with mask on give the whole lot a good brush down.
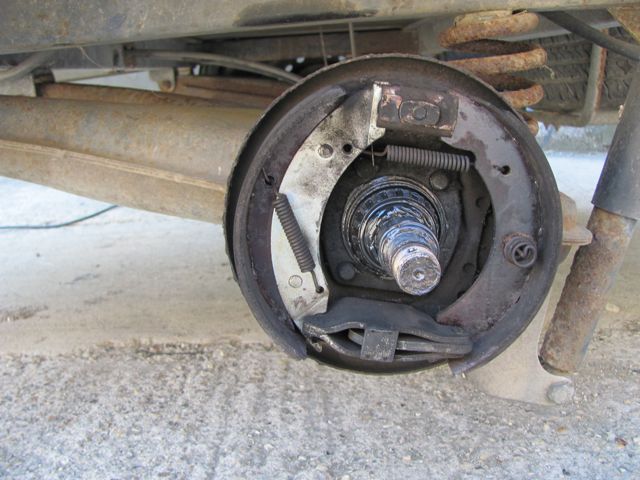
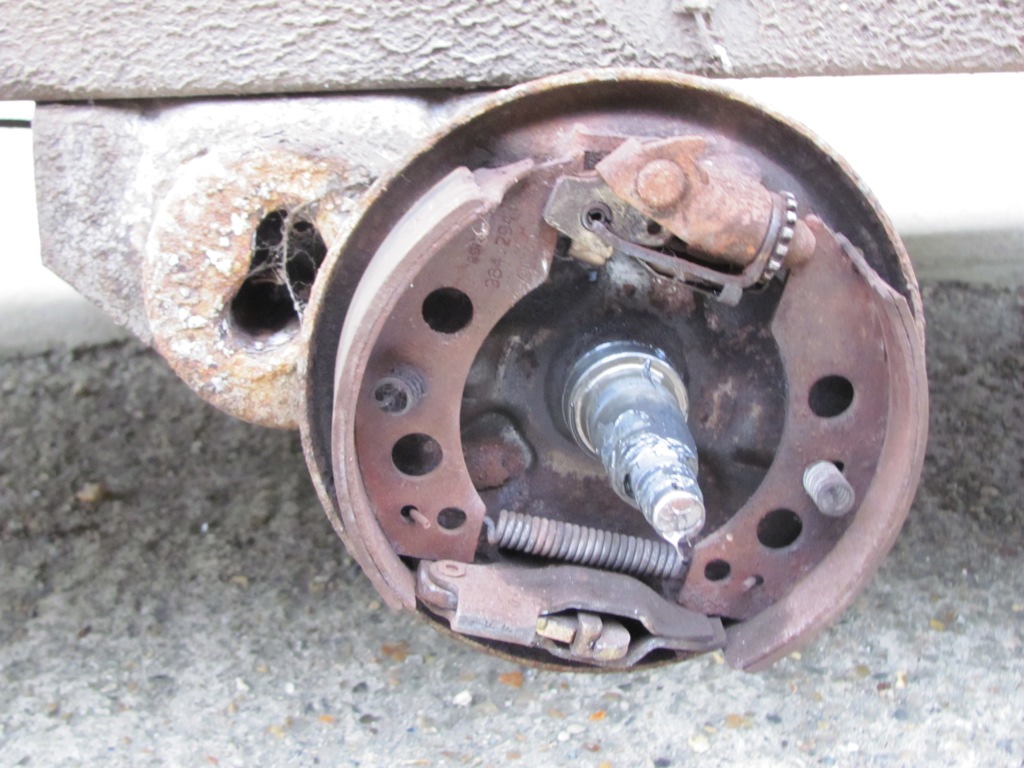
Now it just depends in what position the backplate was fixed to the stub axle assembly as to how the brakes lay but we’ll assume that the adjuster is at the top and the brake cable enters through the bottom, aka Westfalia.
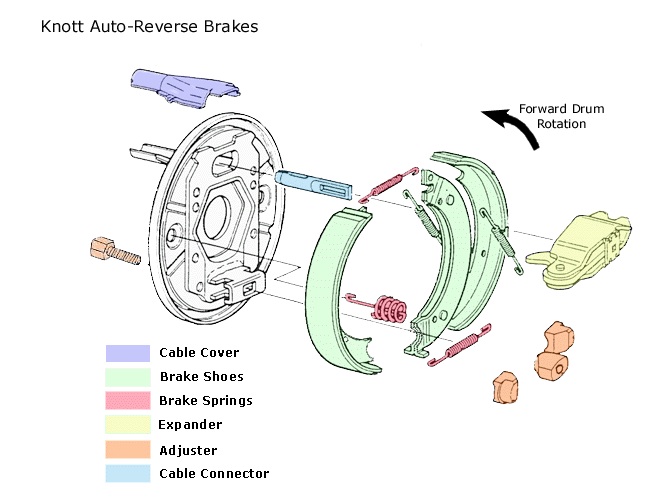
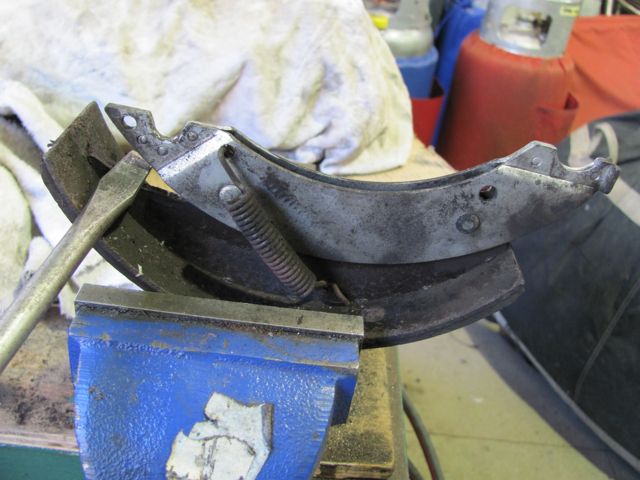
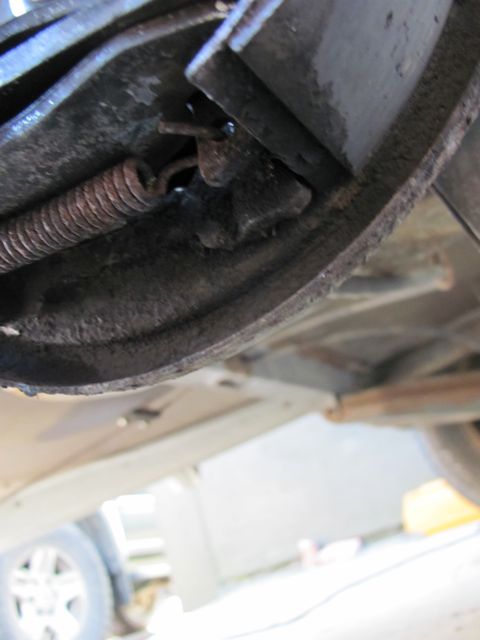 Have a look at brake expander at the bottom. The lever should be fully visible and laying horizontally in line with the backplate. If it is halfway in then the cable or lever is seized. Doesn’t matter at this stage as you will still be able to get the shoes off anyway. Knott brakes have one spring (larger) holding the shoes together across the adjuster and a smaller one across the shoes on the outside of the expander. The shoes differ in that one has the auto-reverse mechanism on it and the other doesn’t. Check the rotation arrow on the auto reverse carrier is pointing the correct way.
  The blank one should have a spiral spring clip on it. This has a hook on the end that engages in a slot in the backplate. Some have a plate that sits on the back of the backplate or a pin that pushes through the hook to hold it in place. With a pair of pliers, or special doodah tool, push it in and unclip it (you may have turn it through 180º) and try and unclip the hook from the slot or separate plate. It should then pull out through the slot and the brake shoe. It can be a bit fiddly.
 Next up using pliers or P-grips on the edge of blank brake shoe where it meets the adjuster lever it back and out from the adjuster. Pull out the other shoe out and unhook the spring from each shoe. What will probably happen is that the whole lot will fall to bits before your eyes leaving the expander mechanism swinging in space on the cable. If that doesn’t happen and you have been professional then open the brakes shoes out and drop them off the lever assembly complete with the spring that holds them together. Now the expander will fall on the floor!
Check to see if the brake expander lever is free and whether the cable has seized up or not by manually operating them. The brake cable is attached to the expander by a bit of linkage. This just unhooks and should stay attached to the cable. Don’t worry if it doesn’t but take care you don’t allow the finished end of the cable to splay. The lever in the expander should move freely to point of rattling about. The cable should push in and out of its outer cable nice and freely. Rotating the inner cable may improve things
Adjuster
At the top is the adjuster. This comprises a couple of tapered wedges that move up and down a tapered block attached to an adjusting nut or bolt on the outside of the backplate. If you give the adjuster where it protrudes through the holder a tap, hey presto, the wedges should pop out. Give them a good clean a wipe of Copperslip and reassemble them. Wind the adjuster back until both the wedges are fully retracted, in other words in the fully off position.
Brake Expander Lever – freeing off.
If the assembly is seized or tight then copious amount of wire brushing and WD40 (or similar combined with a bit of tapping in a vice should free it off. It should move nice and loosely. Once cleaned up and free try and lubricate it with a dollop of Copperslip. Don’t go mental with the stuff but try and work a bit into the swivel pin.
Checking and Removing the Brake Cables
 To be honest it’s a falsehood to free off brake cables. If they are sticking then the best thing to do is replace them. Only if there is categorically no kinking or damage to the outer cover and they can be moved back and forth with a bit of effort is it worth the trouble.
If the cables are in good nick you don’t have to remove them but it is easier to re-assemble the brake shoes with the cable disconnected from the backplate end. It will assist later if you drop the cables out of the balance bar. You’ll probably have to use a pair of mole grips on the cable against the spanner to undo them. Don’t be afraid to use WD40! Westfalia Trailers use a return spring on the operating rod that runs between the balance bar and chassis member. If its missing or corroded don’t worry about it will work perfectly well without but you must ensure that all the other linkage, including the coupling is free.
To remove the cable completely you will have to disconnect it from the balance bar by undoing the lock nut or nuts on the adjuster (usually 13mm spanner). If that is successful then you need to undo the nut locking the cable to the axle or chassis depending on the set up. This is usually 19mm spanner sized. More often than not they won’t come undone and we simply cut them off with a grinder cables and all. At the backplate the cable will either have a collar that pushes over a split holder or a collar that pushes into a corresponding holder. These can be very corroded and care may be needed to prevent twisting the holder. A pair of mole grips round the collar and a few squirts of WD40 up its chuff combined with gentle rocking back and forth should allow you to pull it off. The cable will most likely have a linkage on the end into which the nipple on the end of the cable goes.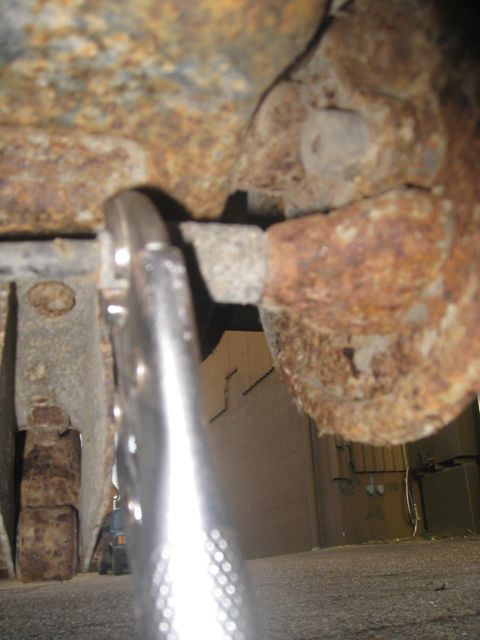
If the cable looks like it has half a chance of survival then give it a good clean up where the cable exits the ends. Retrieve the WD40 from under the trailer where you left it and pull the cable fully out spray it liberally and work it back and forth. Do the same to the other end. We lubricate new and old cables before refitting by gently clamping the collared end in the vice and filling it with 3in1 oil. Any oil will do but the lighter it is the easier it will be for it to run down the cable. Gently work the cable back and forth then top it up again. Be patient and eventually it will run out the other end. This will prolong the life of the cable. This is an old-fashioned motorbike practice that we still use on cables generally.
Wheel bearings
 We are not going to go into replacing wheel bearings in this bit but now all the gubbins is out the way if the inner bearing and seal has stuck on the stub axle it is now much easier to remove it. Care needs to be taken not to damage the oil seal. In most circumstances gently prying in the gap between the wheel bearing carrier against the backplate (not the seal) on alternately sides will ease it forward and off. If that doesn’t work try between the seal and stop on the stub axle but make sure you don’t damage the seal. If it won’t budge then more drastic action will be required. More on that in another chapter!
In the case of adjustable taper roller bearings give them a good clean. Don’t use petrol. Parafiin is OK as are any of the de-greasers on the market but do ensure that if you use one then ensure the bearings are good and dry before re-packing them. 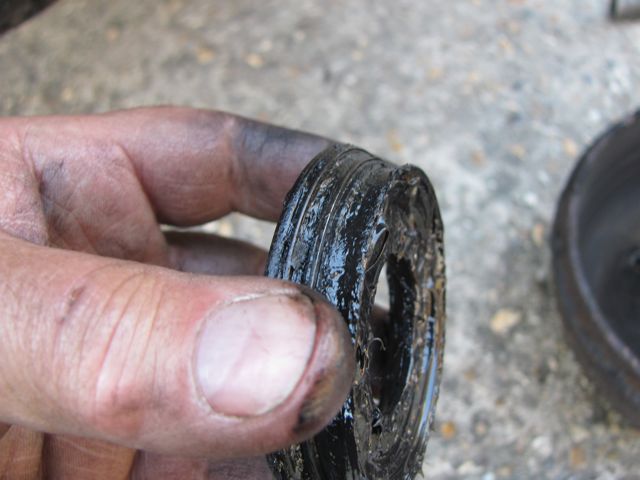 If the rear bearing is still in the drum sat behind the seal then carefully prise the seal out. A decent screwdriver will do but make sure you get the end as far into the gap between the seal and back of the bearing as possible. A good clean off with a cloth should enough. Wipe as much of the old grease off as you can spinning the bearings as you go. Carefully clean the seal out. There is a small spring running round the inside of conventional seals which may came out during cleaning. Make sure it goes back on prior to reassembly. Earlier Westfalia trailers use a moulded plastic seal carrier with a concentric spring affair forming the seal. These are prone to melting if the drum has run hot. Providing there is no evidence of grease getting onto the shoes or into the drum then they should be OK to put back even if they appear mullered. If they are totally knacked then they can be replaced by a more conventional style seal.
Get your fingers into the drum centre and hook out all the old grease. For some reason people seem to think that by packing this full of grease the bearings will be better lubricated. What does in fact happen if you over pack with grease is that it will run hot, expand and escape past the seal contaminating the shoes. You would be amazed how little grease you really need to keep everything whizzing round.
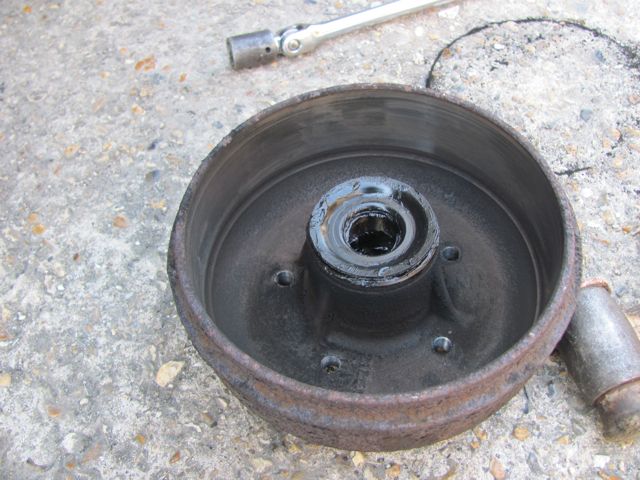 Once you are happy that all is clean and lovely then starting with the back bearing load your finger with a dollop of grease and work it into the bearing turning as you go. Wipe a another finger full around the bearing cap (the bit the bearing runs against) then drop the bearing in and turn it a couple of times. Next take the seal give that a wipe around with grease and press it back into place. If it’s a conventional type then use the handle of the hammer to gently knock it in until its face is level with the drum centre. Now turn the whole lot over and wipe a couple of fingers full of grease round the inside of the drum centre. Repeat the greasing of the outer bearing and carrier and drop that into place. Leave to stand!
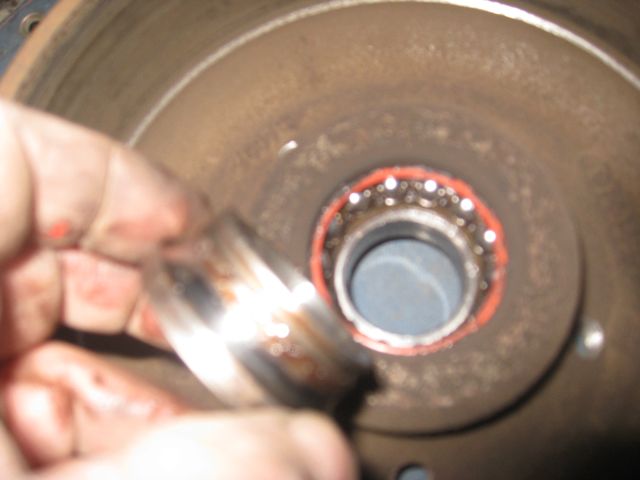 If it is a sealed roller bearing type and the inner part of the bearing has pulled out don’t go into one. Tease it off the stub axle. Hopefully all the bearings themselves will still be in the carrier in the hub. If they aren’t then you need to find them give them a good clean and pop them back. Wipe a finger full of grease around them and rest the inner bit you retrieved from the stub axle on top. Preferably using a socket the same diameter as the centre give it a firm but not excessive tap and all things be equal it should pop back into place. Spin it around to ensure all is well. If the sealed bearing comes off all in one piece don’t try and take it to bits. It is by definition a ‘sealed’ bearing and no maintenance is possible unless you are in Africa in the middle of nowhere and you can’t get new bits!
Re-assembling the brakes
In the piccies, we are looking at the UK nearside assembly (pavement side) with the front of the trailer to the left. The brake assemblies, not the components, are handed (mirror each other) side for side and as they have an auto reverse slider built in then, if you put them in the wrong way round (tricky) they won’t work.
Re-assembly can be done with the cable in place but it is far easier to do it with the cable removed from the backplate so that’s what we’ll do here. Wash your mits. Open the box. You will see two plain brake shoes and two with the auto reverse mechanism on them. The auto reverse carrier has an arrow stamped on it showing rotation. Make sure it is facing the right way prior to assembly.
 Whether you are merely servicing the brakes or fitting new then it is a good idea to whip the carrier off the auto reverse assembly on the brake shoe and lubricate the sliders with Copperslip before fitting. Clamp the shoe in a vice and with a screwdriver lever the end of the carrier with the small hole in up and back and it will pop off the shoe. On the inside of the carrier are a couple of round rivets. These slide on grooves on the shoe. The carrier is held on by a couple of strong springs. Initially when you reverse the brake shoes are pushed onto the drum by the lever in the expander spreading the shoes. As more pressure is applied in a backwards the springs expand allowing the shoe to ‘slip’ on the drum. If you stop in reverse then try and reverse further without moving forwards it is likely that the brakes will lock. Similarily if you apply the handbrake to a trailer rolling backwards you may well find either the lever goes almost fully upright before the brakes apply or you have to give the handbrake an additional application to apply the brakes. There, now you know!
 With the carrier off make sure that there isn’t any excessive wear on the grooves and if there is any spread of material on the sides of the grooves file it off. Apply some Copperslip to the grooves and try and work a bit down onto the round rivets. To reassemble just sit the carrier back on the top of the shoe and clip the springs back into the hole then push firmly on the end with the little wings and it will clip back into place. To check all is well if you push down on the winged end it should slide forwards and when released slip back.
The brake shoes and expander can now be assembled prior to refitting. Grab hold of the expander. Ensure the linkage is hooked on to the lever and the slot that takes the cable nipple is facing down. Select the correct set of shoes making sure that the auto reverse shoe has got the rotation (forward) direction arrow facing the correct way. Hook the smaller of the two springs onto the holes at the end of the shoes so that the spring hooks are facing down. Next take the expander and with the fat end facing forwards, open the shoes apart and insert it. The fixed part of the expander should be on the auto-reverse shoe and the blank shoe up against the moving lever. Now close the shoes and attach the larger (longer) spring. This should be done from the back. One end hooks into the back of the carrier and the other through the corresponding hole on the blank shoe. Its easier if you put the spring in the blank shoe end in first. Now you are ready to sit the brake assembly back on the backplate.
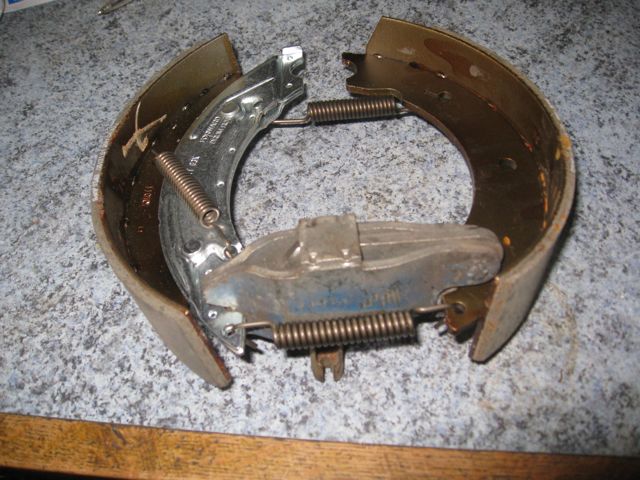 The backplate has a reinforced retaining plate welded onto it which keeps the brakes in place against the springs. A light spread of Copperslip where the shoes contact the backplate is a good idea. Locate the auto reverse shoe into the adjuster first then with the pliers or grips slot the plain shoe in. Simple. Next take the spring clip and compress it pushing it through the hole on the plain brake shoe and through the slot in the backplate ensuring it clips onto the backplate and doesn’t sit at a jaunty angle. The shoes at the expander end should now be sitting up against the retaining plate on the backplate and have no appreciable movement fore or aft. The expander lever should be sitting in the fully closed position and the slot in the cable linkage should be facing down. If you now push the bar in the expander in then the brake shoes should spread and when you release they should return their rest position. Finally make sure the shoes are sitting squarely against the backplate.
Repeat the process for the other side.
Re-fitting the brake drum
Take the brake drum assembly and carefully , keeping it level and centred slide it back down the stub axle. If it bulks part way down give it a gentle shove and it should go on, beating it on will damage the bearings. You may have to jiggle the brakes shoes a little if the drum baulks against the shoes. If it has stuck with sufficient thread poking through the bearing to get the nut on then pull it on with the nut. Make sure that if it has a thrust washer under the nut that it is fitted! Tighten the adjusting nut up as far it goes without excessive force then back it off. Re-tighten until it just nips up against the bearing or thrust washer. Align the castellated nut with the hole in the stub axle and pop the split pin in and folding one half over the end of the axle and the push the other into the slot and snip the extra off. You can check and readjust for play once the wheel is back on if necessary.
In the case of the sealed type of bearing prior to fitting put a light smear of grease on the stub axle. They either just slide straight on or are a devil. If it sticks as you push it on then do not force it, the split between the bearings has probably caught the step on the stub axle. If enough thread is poking through use the nut to pull it on but if not gently tap around inner part of the bearing and it should re-align itself and slide on. Once you have enough thread to get the nut on with a couple of turns use that to pull it home. Tighten it up as tightly as you can get it. That is tight with a big emphasise on tight as in 350Nm tight. Fit a split pin if it has one or with a punch re-stake the ring on the top of the nut into the slot. Some have neither and rely on a locking compound on the threads and there is usually one supplied with the new shoes. If there isn’t clean the threads and apply some Thread-Lock..
Adjusting the brakes after reassembly
 Turn the adjuster anticlockwise (to the left) as you view it from the from the front of the brake drum and spin the wheel in the direction of forward motion until it starts to lock up. Give the drum a tap with the hammer. It will probably spin easily once more. Continue tightening a bit at a time and tapping until the wheel locks up. Back off the adjuster again giving the drum a tap until the wheel turns freely then re-tighten until the slightest of friction is felt. Some rubbing is OK but the wheel should turn freely without binding.
Now repeat the process for the other side.
If you are fitting new cables or if you have just dropped the cable off then hook the cable nipples back into the grooves applying a bit of grease refit the half shell and push the collar on the cable back onto the housing. Repeat on the other side.
Next up you need to re-attach the balance bar to the cables. Slide the bar over the cable ends and screw the nuts back onto the cable ensuring any washers are back in place. You need to tighten them far enough down so that there is some thread poking out the end. If only one nut is fitted it will most likely be an M8 nyloc and should be replaced. New cables come with new nuts. Hold the balance bar in the middle and pull it forwards. The balance bar should be parallel with the axle or chassis member the cables run through or, if you like, 90º to the cables. Next pull on one cable and note the travel, then the other. There should be more or less the same amount of travel in each.
 Re-attach the operating rod to the coupling and tighten it up until there’s no play in it fore and aft. Undo the strap or remove the locking bolt from the handbrake lever and operate the lever half a dozen times checking that the wheels lock-up in the on position and rotate freely when the lever is off. Check that when on the balance bar is still parallel to the axle or chassis member. If it isn’t firstly re-check the brake adjustment on the brakes themselves then re-adjust the cables. Grab the operating rod and move it back and forth you will most likely find that there will now be play again. Adjust the operating rod at the lever until there is a tad of play, about 3-5mm will do. Be careful that excess thread on the operating rod poking out the back of the connector fitting doesn’t interfere with the lever. If it does take the slack up on the cables or if it will move, the adjusting nut at the balance bar end. Finally pull the brakes on and check the brakes lock-up on both sides with the lever coming no more than about 30º from the horizontal.
Put the wheels back on and tighten the wheel nuts or studs. These are M12 and should be tightened to 110Nm. A very light smear of Copperslip on the end of the thread is good. Check the bearings and redjust if required, slight play is permissible and knock the dustcap on. There is no need to fill the dustcap with grease!
Pull the handbrake back on and try and turn the wheel backwards. It should just be possible to achieve this before the brakes lock on. As you do so the handbrake lever should come up higher. If they don’t lock up then there is too much slack in the system.
Road test – running in please pass
There is only one real way to see if all is well and that’s tow it up the road and try the brakes. Don’t slam the brakes on they will need bedding in. Firstly check that they stop and release by braking gently to a halt then pull forward. Make sure the auto-reverse is working by trying to reverse the job, obvious really. You shouldn’t notice any resistance as you pull forward. Do this a few times then get up to a steady 50mph and brake gently. The brakes should come on progressively without a clonk or locking of the wheels. If a wheel or the wheels lock up then the brakes are most likely over-adjusted. If there is a noticeable clonk before the brakes come on then the damper has had it or the operating rod requires further adjusting up.
On your return check the tightness of the wheel nuts. Take it steady for the first couple of hundred miles and then re-check the adjustment. The brakes won’t be 100% effective until they are fully bedded in. The biggest contributor to brake wear is driving with the handbrake on, backing up steep inclines or backing over high curbs, heavy braking and leaving the handbrake on for long periods. Nuff said.
Al-Ko Brakes
 Staffordshire Trailers used Al-Ko brakes on some of their trailers. Although fitted to Al-Ko chassis and axles they don’t appear to be used by any other manufacturer. Without regular maintenance they will stop working. Despite only having one return spring these brakes are really overcomplicated and very prone to seizing up. If you replace them then it is important to drop the cables off completely and ratchet up the adjuster until the drum will just pass over the shoes otherwise you will spend a fortnight scrabbling from the back through a fiddly slot. Before reassembling lubricate anything you think moves (apart from the braking material) with a light wipe of Copperslip. The auto-reverse is part of the adjuster assembly and is prone to seizing up so you most likely have to free it off. If it is beyond heat and help then new units are available. Shoes and cables are still obtainable for older models. Parts are widely available through eBay but be careful that you are certain of what you want. There are many permutations and combinations. One of the best companies we deal with is Discount Towing Supplies which operate through an eBay shop.
Golden Rules
1. Think safe. Use axle stands and a face mask.
2. If you are simply adjusting up the brakes ALWAYS make sure there is slack in the cables and a bit of free play in the operating rod. Start your adjustment from the brakes themselves followed by the balance bar and finally, if it needs it, the operating lever.
3. Do not over tighten the brakes when adjusting. Slight rubbing is acceptable but binding isn’t.
4. If you are going to be parking up the trailer for any length of time chock the wheels and leave the handbrake off. If you are operating in wet, frosty or snowy conditions park up with the handbrake off. It is amazing how tiny a bit of rust or ice on a drum only needs to be to prevent rotation and surface rust will form very quickly on brake drums.
5. Check and adjust, if necessary, brakes and wheel bearings regularily. We would suggest every couple of thousand miles or at least once a year.
6. If you ever have a brake drum get hot strip it down as soon as possible to find the fault. It is almost certain that the wheel bearings will have suffered as a result so check them at the same time.
7. Do not overpack the wheel bearings and always use a new split pin where fitted.
http://www.knott-trailer.co.uk/index.php/cPath/81/category/trailer_spare_parts.htm very good site with everything listed and online shopping. Brake parts are under trailer spare parts if you end up on the home page.
http://stores.ebay.co.uk/Discount-Towing-Supplies Really good suppliers. Contact them on 01482 585658 for help. They stock a lot more older stuff than shown on the website. Good for older Al-Ko parts and a full range of Knott parts.
http://www.al-ko.co.uk/ Al-Ko’s site. There is a good brake guide but not sure how to get it through the website. If you search ‘Overrun Braking System Handbook – AL-KO’ there is a link and you can download it as a pdf. Very useful.
http://www.iwt.co.uk/about-us/distributors Ifor Williams only sell through their distributors. This link will send you to their distributor list.