Like many who find themselves around hot air balloons, I’ve been moved to take (more than) the occasional photograph of them: inspired by their enormous, delightful, unlikely and colourful presence.
All too often, I wasn’t entirely happy with the images that I ended up with, because – unless you happened to find yourself and the balloon in a simply stunning location – most of the shots you might take had already been done a thousand times before. Even if they hadn’t already been done to death, then the pictures I found myself with just didn’t seem to convey that feeling of wonderment that I (still) get when in and around hot air balloons. Fortunately, I found myself with the opportunity to get another perspective…
I’m rarely without a camera, and – when visiting Wendover Towers – and finding myself persuaded (some might say ‘tricked’) into helping out with an inspection, I usually agree, with the proviso that I then get a moment or two inside the envelope, with the camera, once the inspection is done.
I generally only get a couple of minutes inside, if that, between the guys completing their inspection and the envelope being collapsed – unless it’s a flat calm day, which it almost never is. Sometimes it just doesn’t work out at all, but when it does all come together, and John, Chris or Jane wave me in, I get to capture the type of images that I have included with this article.
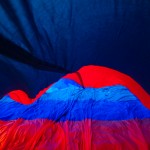
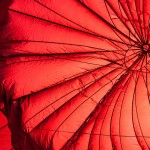
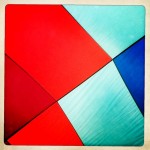
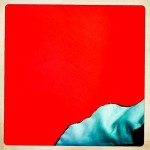
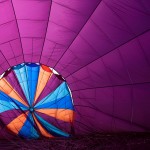
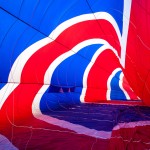
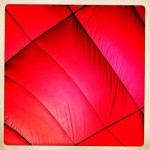
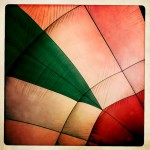
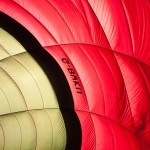
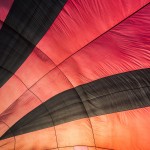
These days, I tend not to bother photographing the ‘whole balloon’ (unless I’m asked to), but prefer to focus on abstract, close-up details, or individual swatches of colour. I will sometimes include one or more of the team in the shot, since this helps give an impression of scale. Plus, they sometimes won’t get out of the way, pleading “I’m working!” as an excuse. Surprisingly, perhaps, it isn’t always the most colourful balloons which provide the best images – sometimes a single, darker colour can be more impressive, viewed from inside, than you would expect – and some of my favourite images have been taken inside envelopes that have been well-used!
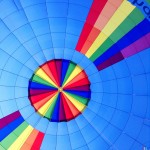
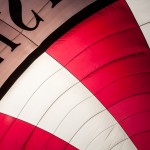
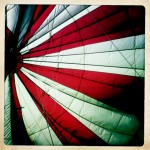
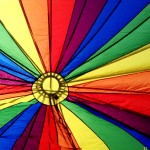
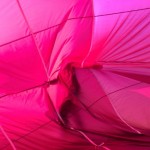
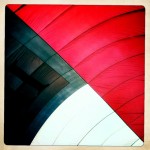
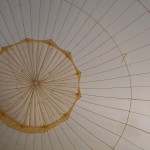
If I can, if time and circumstance allows, I try to grab a shot of the parachute in place. Some of the images I like best are of just that circle of fabric and cord, with the shadows of the lines adding to the overall picture. The balloon envelope doesn’t have to be fully inflated, either, to provide some colourful abstracts: the blasts of air from the fan set the fabric rolling in waves of colour that are constantly changing in shape and form. Advertising logos – when seen from the inside (and ‘back to front’) – can produce interesting results, as can a close-up of contrasting coloured panels – particularly if the sun co-operates.
I use a digital SLR to take many of my photos – Canon gear, in my case, just because I’ve used that brand for years and am used to the controls. Most my ‘Inside’ images are taken with a wide-angle zoom lens fitted. But you really can get super shots with pretty much any camera – it’s the subject that matters, not the camera you use. More and more often I now find myself using the camera on my iPhone – it’s not necessarily ‘more convenient’ than using the SLR camera, but the quality of image you get with the current breed of smartphone is just superb (provided that you remember that you can still get blurred or out-of-focus shots, even with these). Quality aside, I really enjoy the results you get from the iPhone camera Apps such as Hipstamatic and Instagram. I like the square format images they produce, and the ability that they offer to use different ‘film and lens’ combinations. I also frequently use a camera App called Pureshot, which (again) lets me take a square-format image, and which gives me just a little more control over focus and exposure than the ‘point & shoot’ Apps do.
I generally do some ‘digital darkroom’ processing on these images, certainly the ones taken with the digital SLR: the iPhone images that come out of the Hipstamatic app are usually left “as taken” – after choosing from the best of the various options I used. The SLR images I process on a laptop, using ‘darkroom software’ such as Aperture, or Lightroom. On the iPhone, my preferred ‘darkroom app’ is SnapSeed. Using these tools, I’ll maybe tweak the colour saturation and vibrance a little, perhaps adjust the contrast a bit. Sometimes, though, I find that I just can’t improve on the light and colour that I had in the original shot, and I’ll put it back to how I found it. I’m not afraid to crop the image a little, too, but (again) I often find that the original shot is (to my eye, at least) “just right”.
Hope you enjoy this small selection of my “Inside” images. There’s an album full of them on my Flickr account, if you want to see more.